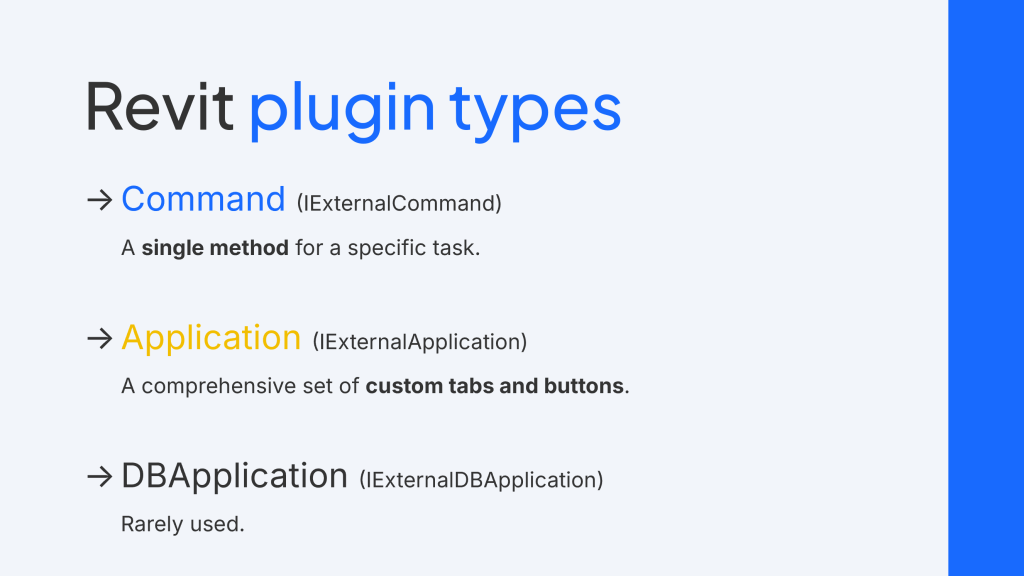
Revit API provides three plugin types: Command, Application, and DBApplication. They have various purposes and customization options.

📌 TLDR – Summary Upfront:
Revit API has 3 plugin types:
➡️
Command (IExternalCommand): Simplest. Great for testing and single-purpose methods.
➡️
Application (IExternalApplication): The “typical plugin”. Customization of ribbon and buttons.
➡️
DBApplication (IExternalDBApplication): Restricted version of Application. Rarely used.
Create the plugins by creating classes implementing interfaces (in brackets).
Remember to register the plugins with manifest files (.addin).
Command (IExternalCommand)
The Command is the simplest type of Revit plugin. It is a single method for a specific task (e.g., renumbering views, organizing sheets, or placing multiple elements with one click).
Commands are placed under the External Tools button in the Add-Ins tab – you cannot customize this placement.
You can assign the command name and description through the manifest file (more about the manifest file later).

Commands are implemented using the IExternalCommand interface. Below is a simple example of a Command showing the path of the current project.
C#
namespace RevitMastery.Revit.Commands
{
	[Transaction(TransactionMode.Manual)]
	[Regeneration(RegenerationOption.Manual)]
	public class RevitMasteryCommand : IExternalCommand
	{
		public Result Execute(ExternalCommandData commandData, ref string message,
		ElementSet elements)
		{
			// Get the basic Revit application and the current document objects
			UIApplication uiApp = commandData.Application;
			Document doc = uiApp.ActiveUIDocument.Document;

			// Get the path of the current document
			var documentPath = doc.PathName;

			// Check if the document path is empty. Based on that, prepare the document	message.
			var documentMessage = documentPath == "" ? "The current project is not yet saved." : "The current project path is: " + documentPath;
			TaskDialog.Show("TestPlugin", documentMessage);

			return Result.Succeeded;
		}
	}
}
To make your Command appear in Revit, it must be registered with a manifest file. Each command must be registered separately, which can be tedious for multiple instances.
XML
<?xml version="1.0" encoding="utf-8"?>
<RevitAddIns>
 <AddIn Type="Command">
       <Name>Revit Mastery Command</Name>
       <FullClassName>RevitMastery.Revit.RevitMasteryCommand</FullClassName>
       <Text>Revit Mastery</Text>
       <Description>Revit Mastery plugin as a command.</Description>
       <VisibilityMode>AlwaysVisible</VisibilityMode>
       <Assembly>D:\Repos\RevitMastery\RevitMastery.Revit\bin\Debug\net8.0-windows\RevitMastery.Revit.dll</Assembly>
       <AddInId>b053b38b-79ca-4f56-8f42-4dc890563e78</AddInId>
    <VendorId>Kamil Korus</VendorId>
    <VendorDescription>Kamil Korus from revitmastery.com</VendorDescription>
 </AddIn>
</RevitAddIns>
The registration process is described step-by-step in the Start Revit API Programming Guide.
Commands are great for testing. But as your plugin grows, you may need more customization (e.g., own ribbons and buttons). For this, you need the Application plugin type.
Application (IExternalApplication)
The Application plugin type allows you to create custom tabs, buttons, and other menu items in Revit. This is what most people think of as a “typical plugin.”
The created Revit menu items can be customized and styled. You can add button images, descriptions, and tooltips.

The Application code logic differs from the Command. The Command “executes” a single method when clicked, while the Application performs actions on Revit’s opening (startup) and closing (shutdown). Typically, it creates custom Revit menu tabs, panels, and buttons and links the buttons with commands (methods) to be fired when clicked. The actual code is placed in the commands linked with buttons – in the example below the “Show project path” button is linked with the command created before.
C#
namespace RevitMastery.Revit
{
  [Transaction(TransactionMode.Manual)]
  [Regeneration(RegenerationOption.Manual)]
  public class RevitMasteryApplication : IExternalApplication
  {
    public Result OnStartup(UIControlledApplication application)
    {
      var assemblyPath = Assembly.GetExecutingAssembly().Location;

      var ribbonName = "Revit Mastery";
      application.CreateRibbonTab(ribbonName);
      var panel = application.CreateRibbonPanel(ribbonName, "Revit Mastery Panel");

      var buttonData = new PushButtonData(
        typeof(RevitMasteryCommand).FullName,
        "Show project path",
        assemblyPath,
        typeof(RevitMasteryCommand).FullName);
      var button = panel.AddItem(buttonData) as PushButton;
      button.ToolTip = "Shows the localization path of the current project.";

      Uri imageUri = new Uri(Path.Combine(Path.GetDirectoryName(assemblyPath), "Resources", "Images", "description_32.png"));
      BitmapImage image = new BitmapImage(imageUri);
      button.LargeImage = image;

      return Result.Succeeded;
    }

    public Result OnShutdown(UIControlledApplication application)
    {
      return Result.Succeeded;
    }
  }
}
Similar to Commands, the Application plugin type must be registered with a manifest file.
XML
<?xml version="1.0" encoding="utf-8"?>
<RevitAddIns>
 <AddIn Type="Application">
   <Name>Revit Mastery Application</Name>
   <FullClassName>RevitMastery.Revit.RevitMasteryApplication</FullClassName>
   <Text>Revit Mastery</Text>
   <Description>Revit Mastery plugin as an application.</Description>
   <VisibilityMode>AlwaysVisible</VisibilityMode>
   <Assembly>D:\Repos\RevitMastery\RevitMastery.Revit\bin\Debug\net8.0-windows\RevitMastery.Revit.dll</Assembly>
   <AddInId>a1f29cab-4880-4e59-86b2-c6fbb0dccb92</AddInId>
   <VendorId>Kamil Korus</VendorId>
   <VendorDescription>Kamil Korus from revitmastery.com</VendorDescription>
 </AddIn>
</RevitAddIns>
DBApplication (IExternalDBApplication)
DBApplication is the least common plugin type. It runs code during Revit’s startup and shutdown, but it can’t modify the UI and is rarely used.